Welcome to our Ultimate Guide to Tufting!
Step into the enchanting world of tufting, a captivating and evolving medium of artistic expression.
Whether you're a seasoned tufter or just starting on this exciting journey, we're delighted to have you join us.
Here, we are dedicated to unravelling the intricacies of tufting, guiding you from the very beginning to the splendid finish, and offering insights to fuel your creative spark.
Our commitment to excellence continues beyond the initial release of this guide.
No, it's just the beginning.
Our guide is a living, breathing resource that will continually evolve and grow, adapting to the ever-changing landscape of tufting.
We encourage you to check back frequently for updates as we strive to stay at the forefront of this exciting new art medium.
Why the constant evolution, you ask?
Tufting is a relatively new phenomenon; we're all explorers in this uncharted territory.
With its ability to weave yarn into an upright frame, an industrial-looking tufting machine is a tool of boundless creativity.
While TikTok might showcase the result with ease, the reality is that tufting is a skill that requires dedication and practice.
As a community, we're still uncovering its secrets and pushing the boundaries of what's possible.
But here's the exciting part - we're not on this journey alone.
We rely on the vibrant and passionate tufting community, just like you, to share experiences, insights, and breakthroughs.
Our customers are pivotal in offering valuable feedback that guides our continuous improvement.
Our internal research and development team works tirelessly to push the boundaries of tufting innovation.
So, whether you're here to master the intricate techniques, explore your artistic potential, or bask in the beauty of this evolving medium, know that you're part of something special.
Welcome to the world of tufting - where artistry and innovation unite in a symphony of threads!
In the beginning
Our journey into the captivating world of tufting began unexpectedly – through a TikTok video that caught our attention during the height of the pandemic lockdown.
As the world grappled with unprecedented challenges, we stumbled upon a mesmerising textile art form that instantly piqued our curiosity and ignited our passion.
Its unique blend of creativity and machismo made tufting intriguing to us.
Unlike traditional textile crafts that often lean towards the feminine side, tufting offered a rugged and industrial allure that spoke to a broader audience, including men who might not typically be drawn to knitting or crocheting.
The thought of harnessing an industrial-looking machine, reminiscent of Arnold Schwarzenegger's iconic role in the "Predator" movie, was undeniably appealing.
With a newfound enthusiasm and the allure of this innovative art form, we embarked on a journey of experimentation.
However, the challenges were real, especially during the peak of lockdowns and the grip of the COVID-19 pandemic.
Acquiring the necessary tools and equipment proved daunting, but our determination and passion fueled our pursuit.
Fast-forward to 2022, and our perseverance finally bore fruit.
Armed with a deep understanding of tufting's potential and armed with the tools and knowledge we had been yearning for, we proudly launched this captivating craft to the public.
Our mission was twofold - not only to offer the tools and equipment needed for tufting but also to share the joy and excitement of this art form through immersive workshops.
As we took our first steps into the world of tufting, we were driven by a desire to break down barriers and introduce a diverse range of individuals to the beauty of this creative medium.
We recognised the power of tufting to transcend gender norms and ignite a newfound passion in those who might have never considered themselves artists.
Today, we stand at the crossroads of innovation and tradition, fueled by the challenges we overcame and the passion that propels us forward.
Our tufting journey is a testament to the resilience of the human spirit, the boundless possibilities of art, and the unbreakable bonds that form within a creative community.
Introduction
What is tufting?
Modern tufting is a type of textile art in which a yarn penetrates a stretched primary fabric with a tufting machine (or a tufting gun).
A tufting machine is commonly used to automate the tufting process, specifically in the art of rug making.
What is the tufting process?
The captivating art of tufting, a fusion of creativity and precision, unfolds through a mesmerising process divided into four distinctive phases - tufting, glueing, backing, and finishing.
- Tufting: The journey begins by stretching your chosen primary fabric onto the frame, transforming it into a blank canvas ready to come to life. With your design in mind, the next step involves transferring your vision onto the primary fabric, mapping out the intricate pathways that yarn will soon traverse. Then, with a sense of purpose and passion, tufting takes centre stage as you skillfully manipulate the tufting machine to penetrate yarns into the primary fabric, transforming it into a tactile masterpiece.
- Glueing: Glueing enters the scene as a pivotal step, adding stability and longevity to your creation. Applying a hardening adhesive to the back of your tufted project ensures that each yarn tuft remains securely in place, promising a durable and enduring art piece.
- Backing: The backing phase introduces a layer of complexity as secondary fabric and twill tapes come into play. This addition provides structural reinforcement, ensuring the integrity of your tufted work. Like the foundation of a building, this layering process lays the groundwork for the visual and tactile feast your masterpiece is set to offer.
- Finishing: Finally, the finishing touches bring your tufted creation to its full potential. The artistry shifts to meticulous cleaning and refining as you meticulously trim excess yarn and layer textures to achieve a harmonious aesthetic. This final flourish ensures that your tufted artwork boasts the polished and professional look that distinguishes it as a true masterpiece.
How much does tufting cost?
Tufting, like any form of art medium, has costs involved.
However, as you acquire the essential tools, the cost decreases over time.
Like running a business, specific tools should be considered an investment, and others as running costs.
Here's an example of which tools you can classify as an investment and running costs:
- Investment: Tufting Machine, Trimmer, Shear, Frame, Projector, Scissor
- Running Cost: Yarn, Fabric, Carpet Adhesive, Adhesive Spray
You can enjoy a 15% discount for your first online order using the coupon code HANDMAYK15.
And every purchase comes with a rewarding 10% cashback!
Health warning
Like many other art mediums, tufting has side effects that may impact your health.
Please consider taking some safety precautions if needed.
- Tufting environment: Always maintain a clean and organised workspace to prevent any injury.
- Noise: The sound of the tufting machine is similar to a loud sewing machine. You can tuft using earplugs or noise-cancelling headphones.
- Fibre inhalation: Yarn is made of loose fibres that are rolled together to create a continuous strand. When the fibre moves through the head of a tufting machine, it sheds, causing you to breathe in small amounts of those shed fibres. The lasting effects of inhaling yarn shedding vary depending on how frequently you tuft. Regardless, we recommend wearing a mask while you tuft.
- Adhesive toxicity: Adhesives range in toxicity levels and odours; some can pose a respiratory threat. We recommend applying adhesive in a well-ventilated area and wearing a mask and gloves during application.
- Body pain: Tufting machines can be heavy. If your wrists, feet, or back start to ache, take a break and stretch! We recommend practising good posture while tufting.
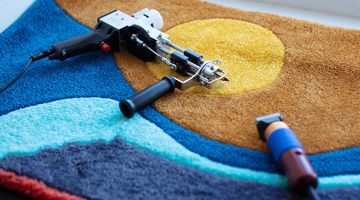
Tufting machine
How many types of tufting machines exist?
There are three types of tufting machines: loop pile, cut pile, and loop & cut pile.
Cut pile tufting machines are widely regarded as the best for beginners.
They are relatively light compared to other tufting machines, are simple to use, and are significantly easier to fix and repair.
What is the difference between loop pile and cut pile tufting machines?
As a basic overview, a loop pile is where the yarn is not cut as the tufting machine moves across the primary fabric, resulting in small bumps (loops) where the yarn weaves through your primary fabric.
Cut pile involves the tufting machine cutting each length of yarn as it weaves through the primary fabric.
Can I adjust the pile height?
Yes, you can adjust the pile height, which varies depending on which tufting machine you have.
Loop piles are generally the easiest to change.
Refer to the tufting machines manual on how to adjust the pile height.
How can I thread the tufting machine?
Use a yarn threader.
Generally, every tufting machine has a yarn guide at the top and a needle hole at the front.
The tufting machine must be threaded through the yarn guide and the needle hole.
It is crucial to remember how many yarn strands to use while threading.
Generally speaking, thread double strands if you are working with a worsted weight yarn.
If you use thinner yarns, you must thread more than two strands.
This depends on the desired density you want for your project.
How do I work with a tufting machine?
Push the needle and foot of your tufting machine into your primary fabric and apply significant pressure.
If your pressure is not consistent or too light, then the yarn will not effectively pass through the primary fabric as you work and may even push out towards the back of the primary fabric.
This may cause issues ranging from tears and yarn fallout to inconsistent piles on your piece.
Rotate your tufting machine with you in the direction you want.
Using the handle of the tufting machine to help prop up the tufting machine and take some of the load weight off your wrist.
The foot of your tufting machine must always be in front, guiding your work.
Don't ever "backtrack" or drag the tufting machine.
Any mistakes in the design can be corrected throughout the tufting process by simply pulling out yarn strands from the primary fabric and re-tufting the area.
How do I maintain a tufting machine?
Always lubricate your tufting machine before use to ensure optimal performance.
We recommend sewing machine oil, as it is colourless and odourless.
Generally, you should oil the moving parts that could suffer from frictional resistance.
Ensure your yarn feed is smooth and without disturbance, as knotted or fuzzy yarn can jam your tufting machine.
Tufting machines must be regularly cleaned and maintained with a brush, which removes excess yarn fluff that gathers around the needle and gears and helps the mechanism to move without any extra friction.
Always unplug the socket before checking and debugging, and maintain a clean and organised workspace to prevent injury.
Take breaks in between tufting sessions and check on the joints often.
Don't overwork the tufting machine.
If you hear any sudden noise or unpleasant cracks that disturb the consistent motor sound, stop and unplug immediately.
Check and tighten all parts manually.
What type of issues would I expect with the tufting machine?
Some of the general issues that you may face are:
- The machine is not switching on
- The speed adjuster is not working
- The trigger is not working
- Resistance with the tufting machine
- Mechanic jams due to yarn tangling
- Yarn not cutting (cut pile tufting machines)
- Inconsistent piles while tufting
If you face any of the above issues, please visit our outlet, and our service centre team will assist you.
Why should I buy a tufting machine from Handmayk?
The main reasons are warranty and after-sales service.
A 6-month warranty backs each machine that we sell.
This means you can purchase with peace of mind, knowing your investment is protected against potential defects or issues.
After all, you are buying a machine which will require service.
And we have a service centre that can accommodate any required maintenance.
You can buy tufting machines from most online marketplaces; however, they do not have a warranty.
Based on conversations we have had with our customers who have purchased elsewhere, tufting machines were either delivered not working or stopped working after a few months.
Tufting frame
How large should my tufting frame be?
This is entirely up to you.
We recommend a 70cm tufting frame if you are starting.
This is because most primary fabrics are sold per meter.
This will allow you to have an overhang, making stretching your primary fabric easier.
A tufting frame must be sturdy and either freestanding or clamped to a tabletop (and your table must be sturdy as you don't want your table to move when working with your tufting machine).
Some prefer keeping multiple frame sizes; as you practice, you will realise how important time is in tufting.
How does the primary fabric stick to the tufting frame?
The frames that we sell have grippers attached around the tufting frame.
These grips consist of a piece of thin plywood, with many small nails along each side which face away from the tufting frame.
To attach the primary fabric to the frame, stretch it over it and press it down into the gripper.
This will hold the primary fabric in place while you work on your project.
You may need to adjust the tension of the primary fabric as you work to ensure that it stays tight and smooth.
Once you have finished your project, you can remove the tension on the primary fabric from the tufting frame.
The gripper should release the primary fabric easily, leaving no residue or damage to the primary fabric.
How do I set up my yarn feeder?
All of our tufting frames come with two yarn feeders.
You can set up your yarn feeder to the left or right of your tufting frame, depending on whether you are left-handed or right-handed.
To set up, stick your cones on the yarn feeders, take the strands and feed them to the eye hook (from under the eye hooks, not from above).
A proper setup is essential to keep the tension consistent, save time, and avoid interference such as resistance and unthreading.
Tufting fabric
What primary fabric can I use to make tufted rugs or other projects?
You may have encountered the term "Monk's cloth" while searching for what type of primary fabric to use for tufting.
Generally speaking, Monk's cloth is a good option for tufting, but there is some debate regarding its efficacy.
Monk's cloth is typically made of 100% cotton.
While relatively similar in appearance, we've identified the cotton/polyester blend as ideal for tufting.
This is because cotton is more likely to rip and tear and can be less malleable to work with on the tufting frame when stretching.
Furthermore, 100% cotton Monk's cloth is more easily "overworked," which is essential to remember if you intend to make a piece threaded with dense yarn or with a lot of closely tufted sections.
Some people still prefer to work with 100% cotton as it may suit their ideal project or to have their pieces be environmentally conscious with 100% natural fibres.
The choice is yours, and it will take practice and testing to see what works best for you.
At this stage, the "gold standard" for primary tufting fabric is a cotton/polyester blend.
If you look at the pointed end of your tufting machine, it becomes clear why there is a need for flexible fabric with "holes" large enough to allow the needle to puncture and move.
What is the difference between primary and secondary fabric?
Primary fabric is the fabric you will work on while you create your project.
This is the fabric you will stretch onto your tufting frame and use your tufting machine to bring your designs to life.
Secondary fabric (or backing fabric) refers to the fabric you will attach to your project once finished and sealed with a hardener and adhesive.
Depending on whether your project is ornamental or destined to be walked on should inform what material of secondary backing fabric you use.
How much should I stretch my primary fabric?
This requires trust and intuition, but the basic aim is to tighten your primary fabric so you can flick it with your fingers and get an excellent, firm, almost drum-like resistance.
Begin by lining up the top of your primary fabric on your tufting frame, then align the left and right sides.
Finally, pull down the bottom side as hard as you can.
How do I get my design onto my fabric?
You can approach this in two different ways:
- Direct drawing: Take a marker and draw the design onto the back of the fabric.
- Projection: Project the image/design onto the fabric to have a clear guide to work from.
Remember that you'll work from behind, so your final product will be reversed.
Remembering this is especially important if you include written words in your work!
Tufting yarn
What yarn can I use with my tufting machine?
Basically, any yarn that fits through the hole on the needle!
The main yarns used in tufting are acrylic, wool or cotton.
Wool yarn is best for rugs as it is the most resilient.
Acrylic is a good yarn for beginners, and it is pretty affordable.
Yarns that work (and are tested by Handmayk) with cut pile tufting machines are:
Just remember to double-strand them.
What types of yarn are there, and what should I use?
Different types of yarn have different properties, each with pros and cons.
The most important things to consider when deciding which yarn to use are:
- Where will your project end up?
- How durable does your project need to be?
- How flexible does your project need to be?
All yarns fall into one of two categories: synthetic and natural.
Synthetic yarn means that the yarn is artificial, like acrylic.
Natural yarns can be subdivided into two categories: animal-based or plant-based.
Animal-based yarns come from sheep, alpaca, mohair, etc., and plant-based yarns come from cotton or bamboo.
- Wool is the ultimate yarn for tuft rugs, used in carpet making for hundreds of years. Wool predates any synthetic fibre, so most commercially available carpets are made of wool yarn. Wool is durable and tends to hold its shape after much foot traffic. It is ideal for any tufted rug treated as a typical carpet or rug. Depending on the quality of wool yarn you are purchasing, and its size, there can be significant variation in how soft and malleable wool is. Typically, wool is slightly coarser than other yarn variations (partly due to its durability). Wool yarn sheds slightly though this will depend on the type and quality of wool yarn used, how it has been processed and the length and diameter of the fibre. Remember that some people are allergic to wool, which is particularly important if you intend to sell your work.
- Acrylic yarn is a very popular fibre partly because of its relatively lower price point and availability. Acrylic yarns tend to come in many colours and are available in abundance. Acrylic is a fantastic place to start and perfect for beginners who want to work on a project without repeated interaction. Depending on the quality of acrylic yarn, its size, and the length of your pile, there will be some variation in how soft acrylic yarn is. Generally, acrylic fibres are soft to the touch (especially compared to most wools). The major drawback of acrylic yarn is that it does not stand the test of time when used for tufted rugs, where it tends to pill and fray easily.
- Cotton yarn is a plant-based yarn which is another popular choice for tufting. As far as natural fibres go, cotton is a cheaper alternative to traditional wool yarns. Often available as organic or recycled, cotton yarn is an excellent option for tufters who want an environmentally conscious choice that is relatively more durable than acrylic. Cotton is not ideal for cut pile tufting or carpet making as it needs strength to maintain shape. Unlike wool, cotton yarn is not 'bouncy' because it does not spring back into shape when stretched. Cotton tends to be lighter than other natural fibres, making it a good option for tufters who want to create wearable pieces.
What size yarn should I use?
"If it fits, it sits"... generally speaking, anything that will thread in your tufting machine can be used to tuft.
That said, be reasonable about your expectations and approach with common sense.
Of course, you could use embroidery thread in your tufting machine; however, given the nature of the primary fabric, it is unlikely that it will maintain consistency or give you an appealing pile.
Conversely, if you were to push through 3 strands of very thick yarn, you may put pressure on the tufting machine and create a larger-than-ideal hole.
Can I thread more than one strand of yarn in my tufting machine?
Yes! As stated above, anything that fits in the eye of your tufting machine needle will work.
What is the difference between threading one strand of yarn versus many?
This will come down to what aesthetic you want in your final piece.
You would want to thread less yarn for a sparse, less dense feel.
Conversely, you may thread two or more strands of yarn for a denser and tighter pile.
This decision is entirely yours to make and warrants some testing before you dive into your main project to see what works best for you.
Can I thread multiple lengths of yarn at once?
Yes! Especially if you want a thick/dense-looking finish or if you're going to provide some depth by including different colours.
This is particularly good when colouring hair or something similar.
Finishing
I've finished tufting; what next?
Ultimately, you must seal your project so the yarns do not become loose and fall out.
You can do this in several ways, the most popular being a latex-based carpet adhesive.
Latex-based adhesive is beneficial for tufted pieces as it provides flexibility and stability.
The project should remain stretched on the tufting frame until the adhesive has finished drying (up to 24 hours) to avoid losing shape.
How do I cover the carpet adhesive on the back of my project once it's dried?
Some prefer to cover the back of their glued project once it's dry.
This may be an aesthetic discussion or to protect the project if it is being used as a rug.
The secondary fabric also provides further stability as well as improving its appearance.
One of the more common means of covering the back of your piece is with a felt-based secondary fabric.
A thinner woven fabric is usually best as it will be more forgiving of the variations on the back of your piece; some thicker fabrics may not be as flexible and will therefore show lumps and bumps more clearly.
Use an adhesive spray on the back of your glued project and the secondary fabric and stick them together.
Additionally, some prefer to cover the edges of the back with twill tape to hide any deformities with either a carpet adhesive, glue gun or textile adhesive.
How do I trim/cut/shave/carve/sculpt my piece?
Some people create dimension, layers, and variance by cutting back yarn or shaving at different angles.
This may be done with trimmers, shears, scissors for larger sections, and thread cutter or tweezers for finer details.
Shears are often used to make rough cutbacks, usually to the back of the project, as they are less precise.
However, they are not ideal for carving out dimensions into your design.
This can be done before or after applying the latex adhesive to the backing.
This process also helps to remove any loose fibres which may have come to the surface during the tufting process.
Keep a portable vacuum in hand, and clear your work area as you finish your project, or else it will get messy.
Scissors are the most straightforward option.
You can manipulate the angle of your cuts and control precisely where you are cutting.
Of course, this will be much slower than other options, but the best place to start.
Trimmers are the ultimate device for carving dimensional angles and clean lines into your work.
They are, however, the most expensive option available, so be mindful of this when deciding to invest.
Many will completely cut back longer pieces of yarn before finishing their work, making finishing cleaner.
Be mindful that it is much easier to trim your pieces while they are still on your tufting frame.
Depending on what changes you want to make, be sure you have made up your mind before sealing your project, as it will be challenging to remove yarn once your piece is sealed and dried.
Conversely, shaving back your work may be easier after glueing and drying.
Workshops
Delve deeper into the intricate artistry of tufting through our immersive workshops.
While TikTok may present tufting as a breeze, mastering this medium requires a hands-on approach beyond the screen.
Our workshops offer an invaluable personal learning experience guided by skilled instructors who share their expertise and insights.
Tufting isn't just therapeutic - it's a pathway to generating passive income.
Witness the inspiring success stories of our students who transformed their tufted creations into actual revenue, like the 80cm rug that sold for AED 2,000 or the 100cm wall piece that fetched AED 1,800.
Our workshops cover every journey step, from frame setup to meticulous finishing techniques.
Take advantage of the opportunity to join our popular workshops and unlock the full potential of tufting.
Discover more about our workshops and embark on a hands-on tufting adventure that can lead you to personal satisfaction and financial success.
One-on-One Beginner's Tufting Workshop
One-on-One Complete Tufting Workshop
Shop
Tufting yarns
Handmayk Acrylic Worsted Yarn
DMC Knitty 4 Yarn
Circulo Mollet Yarn
Circulo Classic Pull Yarn
Tufting machines and carving tools
Handmayk Cut Pile Tufting Machine
Handmayk Tufting Trimmer
Handmayk Tufting Shear
Tufting fabrics
Handmayk Primary Tufting Fabric
Handmayk Secondary Tufting Fabric
Handmayk Felt Secondary Tufting Fabric
Handmayk Twill Tape
Handmayk Twill Tape
Frames and accessories
Handmayk Wood Tufting Frame
Handmayk C-clamp
Wownect Mini Projector
Handmayk Yarn Threader
Beorol Bunter Protective Gloves
Handmayk Safety Ear Muff
Handmayk Duckbill Scissor
Bosch Extra Long Nozzle Glue Gun
Black+Decker Cordless Glue Gun
Handmayk Glue Gun
Circulo Tape Measure
Handmayk Ball Winder
Handmayk Umbrella Swift
Handmayk Disposable Apron
Handmayk Safety Glasses
Roberts 3095 Carpet Adhesive
Weicon Extra Strong Adhesive Spray
Circulo Universal Handcraft Glue
Circulo Non-Slip Resin
Bison Textile Adhesive
Black+Decker Cordless Handheld Vacuum Cleaner
Handmayk Cordless Handheld Vacuum Cleaner
Handmayk Wire Brush
Handmayk Lint Roller
Handmayk Lint Remover
Handmayk Carbon Steel Thread Cutter
Sharpie Fine Point Permanent Marker
Penggong Putty Knives Set
Got questions? We're here to help! Leave a comment below, and our instructor will swiftly respond and assist.
Your crafting journey is our priority, and we're excited to accompany you every step of the way.